
 Latest images
Audi Coupe GT rolling resto
Page 1 of 3 • 1, 2, 3 ![]()
![]()
 Audi Coupe GT rolling resto
![]() Si_CoupeGT Thu Mar 03, 2011 3:10 pm
Si_CoupeGT Thu Mar 03, 2011 3:10 pm
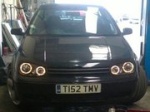
Some history on the car
'B' reg Audi Coupe GT
210k miles
2.2l 5cyl 10v engine running on K-Jet injection (not the original engine, it was changed at some point in the past)
Stainless steel exhaust from the downpipe back with a cherry bomb mid box
K&N panel filter
Lowered on unknown springs
Custom trimmed bucket seats
The car had been in storage for years and then abused as a track slag for a while.
This is how she looked when I bought her, missing a few bits of trim (some of which I have) and looking a bit tatty

Plans are to slowly tidy up the bodywork and sort out the mechanical issues. Both rear arches have already been replaced by the previous owner and he's also agreed to weld up the sills where they've started to rust.
First job was to sort out the clutch. It was difficult to get into gear and crunched badly going into reverse. It's hydraulic on these so the first place to start is to check for leaks and bleed the system. Popped the bonnet and found the clutch reservoir was damaged and the cap was cracked, this was a big problem as Audi charge a huge amount of money for a replacement (about £60!) and I didn't have a spare so I had to make something that would fit and allow me to use my pressure bleeder which is the only way to bleed these things properly.
Here's what I came up with

For those of you that don't have kids, it's a babies bottle. I drilled a hole in the bottom of it, fitted a couple of washers and bolted it up to the old pipe. Then I modified an old lid to attach to my pressure bleeder as shown in the pic. This is only a temporary fix as I'm not sure how resistant the plastic will be to hydraulic fluid. I'm going to buy a reservoir designed for a motorbike and use that instead once I can be bothered. Anyway, bled the system through and now I have a working clutch!
The brakes also felt spongy and had a bit of travel in the pedal so bled those as well, the sponginess has gone but the pedal travel is still a bit much so when I get a chance I'll take it in to college and check the rear brake adjusters.
Next job was to replace the stereo, it was old tape player and only worked when it felt like it. I've had a JVC flip front cd player laying around for a while so thought it might as well get used
This is the old stereo

And this is the mess I discovered when I pulled it out...

I decided I'd solder some new connectors in, so this is how it now looks

Much tidier
And finally a pic of the new stereo in place

This is all I've done for now but the list of jobs is huge
Sorry for the poor quality pics, was using my phone.
Comments and suggestions welcome!
Si

Si_CoupeGT- Starting To Speak

- Posts : 93
Join date : 2011-02-17
Age : 40
Location : Brookenby
![]()
![]()
Re: Audi Coupe GT rolling resto
![]() roccy Thu Mar 03, 2011 3:19 pm
roccy Thu Mar 03, 2011 3:19 pm
and extra brownie points for coming up with the baby bottle idea haha its looks like its working well enuf and keep up the good work,.

roccy- Top Of The World (Legend)
")
- Posts : 1014
Join date : 2011-01-17
Age : 33
Location : grimsby
![]()
![]()
Re: Audi Coupe GT rolling resto
![]() lewis1641 Thu Mar 03, 2011 3:25 pm
lewis1641 Thu Mar 03, 2011 3:25 pm
look forward to seeing this progress

lewis1641- WingMan

- Posts : 1002
Join date : 2011-01-18
Age : 45
Location : brigg -

![]()
![]()
Re: Audi Coupe GT rolling resto
![]() Si_CoupeGT Thu Mar 03, 2011 4:57 pm
Si_CoupeGT Thu Mar 03, 2011 4:57 pm
Si_CoupeGT- Starting To Speak
- Posts : 93
Join date : 2011-02-17
Age : 40
Location : Brookenby
![]()
![]()
Re: Audi Coupe GT rolling resto
![]() caistor_bmx Thu Mar 03, 2011 6:17 pm
caistor_bmx Thu Mar 03, 2011 6:17 pm
Lots of love, Caistor_BMX

caistor_bmx- WingMan
- Posts : 769
Join date : 2011-01-17
Age : 34
Location : Caistor -
![]()
![]()
Re: Audi Coupe GT rolling resto
![]() Si_CoupeGT Thu Mar 03, 2011 6:48 pm
Si_CoupeGT Thu Mar 03, 2011 6:48 pm
There's bound to be a few on ebay though....
as long as you don't mind paying a ridiculous amount of scene tax
Si_CoupeGT- Starting To Speak
- Posts : 93
Join date : 2011-02-17
Age : 40
Location : Brookenby
![]()
![]()
Re: Audi Coupe GT rolling resto
![]() lemski Thu Mar 03, 2011 8:59 pm
lemski Thu Mar 03, 2011 8:59 pm

lemski- Top Of The World (Legend)
- Posts : 1462
Join date : 2011-01-17
Age : 33
Location : north cotes
![]()
![]()
Re: Audi Coupe GT rolling resto
![]() Si_CoupeGT Thu Mar 03, 2011 9:37 pm
Si_CoupeGT Thu Mar 03, 2011 9:37 pm
Si_CoupeGT- Starting To Speak
- Posts : 93
Join date : 2011-02-17
Age : 40
Location : Brookenby
![]()
![]()
Re: Audi Coupe GT rolling resto
![]() Si_CoupeGT Mon Mar 07, 2011 7:24 pm
Si_CoupeGT Mon Mar 07, 2011 7:24 pm
Took the old spoiler off

Car really doesn't look right without it
Here's a pic of the the old one (on the right) and the second hand replacement

The replacement has faded as well but it's not so bad and doesn't have any splits in it, here it is back on the car

I might actually get round to washing it tomorrow, but might pop round and see the previous owner instead as he says he might have a few more spare parts for it floating around
It's not running right at the minute, the engine seems to be low on power. I'm sure it's not as quick as my old Mk2 Golf Digi. Hopefully college will let me bring it in this week for a tune up and I can find out whats up with it.
As always comments/suggestions welcome!
Si
Si_CoupeGT- Starting To Speak
- Posts : 93
Join date : 2011-02-17
Age : 40
Location : Brookenby
![]()
![]()
Re: Audi Coupe GT rolling resto
![]() Si_CoupeGT Sun Mar 13, 2011 5:46 pm
Si_CoupeGT Sun Mar 13, 2011 5:46 pm
Took it into college on Friday to have a look at the timing and found that the vacuum advance diaphram on the dizzy had broken so the timing wasn't advancing at idle and was pulling in extra air which made it run lean. Took the distributor apart and managed to find another vacuum unit thats fits (thanks go to one of the tutors Pete for that). That took most of the morning so didn't have a chance to re-set the timing although the engine is more responsive now there's no vacuum leak.
On the way home from college I noticed the back brakes appear to be binding a bit, at low speed you hear a grating noise coming from the drums
Spent Satuday fixing my central locking. It works off a vacuum pump similar to the setup on MK2 Golfs. Figured the place to start would be to check the pump as they are a common failure. Wired the pump up directly to the battery and it worked fine, so then had to try to the trace the wireing fault. Trying to find a fault in 27 year old wires is not a fun job. Eventually found the fault, I had a broken wire in the drivers door and a corroded connector on the back of the fuse box. Central locking now works perfectly again!
Today I've been sorting out the horn. It only works when it wants, which is annoying when an old biddy pulls out in front of you on a roundabout! Started by looking at the connectors on the horn and discovered more bodged repairs, it's meant to have dual horns but one's been removed and the wireing just left hanging. So I've tidyed up that as best I can and traced the fault for the other to a bad earth connection. It's working again now but without the second horn it does sound kinda pathetic.
That's about it for now, really not feeling the love for this car at moment though. It seems that no matter what I fix on it I end up finding another ten problems.
Si
Si_CoupeGT- Starting To Speak
- Posts : 93
Join date : 2011-02-17
Age : 40
Location : Brookenby
![]()
![]()
Re: Audi Coupe GT rolling resto
![]() Wiztic Sun Mar 13, 2011 6:23 pm
Wiztic Sun Mar 13, 2011 6:23 pm
All worth the effort in the end though bud...that amazing sence of pride when your own work means a 20 odd year old car can embarras any chav in his 6 year old, dying corsa b, you meet at the lights

Wiztic- Can't Shut Me Up

- Posts : 336
Join date : 2011-01-28
Age : 37
Location : Bomber County
![]()
![]()
Re: Audi Coupe GT rolling resto
![]() roccy Sun Mar 13, 2011 11:28 pm
roccy Sun Mar 13, 2011 11:28 pm
roccy- Top Of The World (Legend)
- Posts : 1014
Join date : 2011-01-17
Age : 33
Location : grimsby
![]()
![]()
Re: Audi Coupe GT rolling resto
![]() Si_CoupeGT Wed Mar 16, 2011 8:35 pm
Si_CoupeGT Wed Mar 16, 2011 8:35 pm
It isn't using any coolant so I might be lucky and it's just years of accumulated condensation from when it was stored but I'm probably deluding myself and it'll need a top end rebuild.
Anyway, the plan for this weekend is to clean out the breathers and give it an oil and filter change, then I'll just have to keep my fingers crossed that the mayo doesn't come back
Si_CoupeGT- Starting To Speak
- Posts : 93
Join date : 2011-02-17
Age : 40
Location : Brookenby
![]()
![]()
Re: Audi Coupe GT rolling resto
![]() Si_CoupeGT Fri Mar 18, 2011 7:51 pm
Si_CoupeGT Fri Mar 18, 2011 7:51 pm
Anyway, here's a couple of pics of the mayo in the hoses...


And one with the cam cover off

The cam seems to be in decent condition and there's no creamy gunk on the underside of the cover so that's a good sign.
Did come across one other problem, my dipstick appears to be bent
Plans for the weekend are to clean the hoses, change the oil and filter, replace the thermostat as the engine isn't getting up to temp properly and strip down/clean the back brakes. Also if I have the time and the haynes manual for this engine turns up I'll check the timing marks line up and re-set the ignition timing.
Hopefully once that little lots done she'll be closer to running properly
Si_CoupeGT- Starting To Speak
- Posts : 93
Join date : 2011-02-17
Age : 40
Location : Brookenby
![]()
![]()
Re: Audi Coupe GT rolling resto
![]() Si_CoupeGT Mon Mar 21, 2011 4:34 pm
Si_CoupeGT Mon Mar 21, 2011 4:34 pm
But back to the car! I've cleaned out the gunked up breathers and given it an oil and filter change. Previous owner is a fan of over tightening things so I nearly gave myself a hernia getting the filter and sump plug off!
I've also changed the thermostat and refilled the system with a 50/50 mix of antifreeze, the car now get's up to temperature properly!
Other than that I had a go at setting up the ignition timing. It needs a massive 18 degrees of advance at idle so I've adjusted it and re-set the idle. It still isn't perfect, I'm probably going to have to take it to a K-Jet specialist to get it spot on.
Net result is the engine has some power again!
One more thing, the car has a Clifford alarm in it. the previous owner says it hasn't worked for years but it started working today! I haven't done anything to make it work, it just magically fixed itself
Si_CoupeGT- Starting To Speak
- Posts : 93
Join date : 2011-02-17
Age : 40
Location : Brookenby
![]()
![]()
Re: Audi Coupe GT rolling resto
![]() Si_CoupeGT Mon Mar 21, 2011 5:56 pm
Si_CoupeGT Mon Mar 21, 2011 5:56 pm

Underneath the temp sender is a hole that's been plugged with a bolt, I think there's ment to another sensor there. If anyone knows what it's ment to be I'd be very greatful!
Si_CoupeGT- Starting To Speak
- Posts : 93
Join date : 2011-02-17
Age : 40
Location : Brookenby
![]()
![]()
Re: Audi Coupe GT rolling resto
![]() Si_CoupeGT Fri Apr 01, 2011 6:39 pm
Si_CoupeGT Fri Apr 01, 2011 6:39 pm

Si_CoupeGT- Starting To Speak
- Posts : 93
Join date : 2011-02-17
Age : 40
Location : Brookenby
![]()
![]()
Re: Audi Coupe GT rolling resto
![]() ShoozY Fri Apr 01, 2011 7:54 pm
ShoozY Fri Apr 01, 2011 7:54 pm
ShoozY- Can't Shut Me Up
- Posts : 375
Join date : 2011-01-17
Age : 32
Location : Cleethorpes
![]()
![]()
Electric window woes
![]() Si_CoupeGT Sat Apr 02, 2011 10:00 pm
Si_CoupeGT Sat Apr 02, 2011 10:00 pm
I striped the mech out of the door and then set about dismantling it to find the problem, thought it was going to be a right 'mare but they're surprisingly simple things. Basically there's a metal worm connected to the motor which drives a big plastic gear and that's attached to a plastic wheel with the cables on. Here's a pic of it stripped down

The good news is most of it is in perfectly good nick, but the problem was caused by the plastic gear being worn where it's been rubbing against the worm

90% of the teeth are like that, when they should look like this

I'll need to find another one of these gears, I'm not gonna pay £80 for a new window mech because of a worn bit of plastic. If anyone knows where I could get one then let me know.
One last thing, if you have to use something to hold the window up while the mech is out DON'T use duck tape. When I peeled it off it left a load of sticky crap on the window that's a pain in the arse to remove!
Si_CoupeGT- Starting To Speak
- Posts : 93
Join date : 2011-02-17
Age : 40
Location : Brookenby
![]()
![]()
Re: Audi Coupe GT rolling resto
![]() Si_CoupeGT Wed Apr 06, 2011 6:48 pm
Si_CoupeGT Wed Apr 06, 2011 6:48 pm
Being a vacuum operated system this wasn’t as easy as it sounds! First thing to do was buy a two wire central locking motor from eBay

You’ll also need two 5 pin relays (SPDT type), some 6.3mm female spade connectors, a 10amp fuse for the live and a few lengths of different coloured wires. A wiring diagram for the alarm also comes in handy.
Now for the technical stuff. The alarm has two wires for the central locking, one is a lock signal and the other an unlock signal. Both signals are a 1 second negative pulse. The idea is to connect each wire to a 5 pin relay and then use the relays to control the direction the motor will turn to either the lock or unlock position. By connecting the new central locking motor to the driver’s side lock it means that the vacuum system will then operate the passenger door lock as well.
This is the wiring diagram I’ve come up with:

Basically what happens is that when one relay activates it causes its pin 30 to become positive, while the other relay’s pin 30 stays negative and so the motor will spin in opposite directions depending on which relay is activated.
Strip the driver’s door down and work out where you’re going to run the wires and locate the motor, also move the window up and down to double check you’re not going to catch anything with it.

Locate the motor in the driver’s door, and try to keep the control rod as near to vertical as you can, otherwise the motor will just try to shove whatever you’ve connected the rod too sideways instead of up/down. I’ve had to locate mine to the left and down of the door pin which it’s connected to, but the door pin prevents the rod from moving left or right.

Next it’s a case of making up the wiring to connect everything, here’s a pic of mine without the relays connected

Once it’s all connected up you’ll have something that looks like this

Ignore the block connector between the red and brown wires, I had to extend the power cable and had run out of red wire and solder, I’ll do it properly once I’ve got some more bits!
All you need to do now is test the system and then put all the trim back together. Ideally you’ll want to test it with the driver’s door open (you’ll have to manually push the door latch closed first) just in case it locks but refuses to unlock again! If you find the car unlocks when the alarm is armed instead of locking then you'll need to switch the blue and brown wire round on the relays.
Doing the above should work for most vacuum operated central locking systems such as was used on a lot of '80s VAG cars.
If you’re wondering why I’ve gone to all this trouble just to save myself locking the car with the key, it’s because I’m so used to used to having remote central locking that I keep forgetting to lock the car!
One of other thing I noticed is that when I turn the ignition on the doors lock as well, when the ignition is off the doors unlock, must be some kind of safety thing built into the alarm
If I can be arsed a bit later I'll make a short 'how-to' post for the Haynes section
Si_CoupeGT- Starting To Speak
- Posts : 93
Join date : 2011-02-17
Age : 40
Location : Brookenby
![]()
![]()
Re: Audi Coupe GT rolling resto
![]() Si_CoupeGT Thu Apr 21, 2011 3:19 pm
Si_CoupeGT Thu Apr 21, 2011 3:19 pm
The car has a bit too much pedal travel so after checking every other component I tracked the problem down to the rear brakes. I've previously stripped these down and noticed the shoes were quite worn and the adjusters were already at maximum, hence the extra pedal travel.
New shoes were ordered from ECP (as well as yet another oil filter!). After cleaning everything up with copious amounts of brake cleaner and a wire brush I fitted the new shoes and this is the result

I then started on the n/s/r, but being a twat i managed to pop one of the pistons out of the slave cylinder whilst re-assembling. Fortunatly I didn't get brake fluid on the friction material, but I did have to take it all apart again to give it another clean.
Last job was to bleed the brakes and go for a test drive!
But again being a twat I'd drained the battery by having the stereo full blast, so can't actually start the car
On a side note, Audi seem to have used the strongest springs known to man in the drums, they bloody hurt when they twang and smack you in the face!
Si_CoupeGT- Starting To Speak
- Posts : 93
Join date : 2011-02-17
Age : 40
Location : Brookenby
![]()
![]()
Re: Audi Coupe GT rolling resto
![]() Si_CoupeGT Tue May 03, 2011 5:21 pm
Si_CoupeGT Tue May 03, 2011 5:21 pm

This is where the bolt that holds it to the car is ment to go through so you can see why the bumper used to pull away and sag!
It's ment to look like this

Previous owner had tried to fix the broken bracket with a couple of big washers but it hadn't worked, so I figured I'd build up the plastic with a 2 part epoxy putty (milliput) and then drill a new hole to take the bolt

It isn't the neatest of jobs but it isn't going to be seen so I don't care. After it had cured I sanded it to the rough size and drilled the holes, then bolted it back up. It now sits level again
You can see from the photos that the bumper used to be red, it had to be replaced when the previous owner started the car up with it in gear, the car drove itself up a small embankment and ripped the original bumper off
I've also got the front lower grill coming soon and I've already got the missing piece of side trim near the back arch as well as a second hand rear bumper that also needs spraying. The only trim I'm having trouble finding is the 'hockey sticks' that sit round the n/s headlight so if anyone knows of a set going cheap let me know
Si_CoupeGT- Starting To Speak
- Posts : 93
Join date : 2011-02-17
Age : 40
Location : Brookenby
![]()
![]()
Re: Audi Coupe GT rolling resto
![]() DubaHolic Tue May 03, 2011 6:10 pm
DubaHolic Tue May 03, 2011 6:10 pm

DubaHolic- Admin

- Posts : 606
Join date : 2011-01-16
Age : 43
Location : Louth
![]()
![]()
Re: Audi Coupe GT rolling resto
![]() Si_CoupeGT Tue May 03, 2011 9:54 pm
Si_CoupeGT Tue May 03, 2011 9:54 pm
It's a pain in the arse until you know what you're doing, mine was full of hidden clips and screws. First thing to take off is the plastic cover on the inside of the wing mirror, should be two screws, one on the cover and one on the adjuster. Next there are two big screws on the underside of the grab handle, then the top of the handle is held by a plastic clip with a kind of metal spring clip in it, you have to rotate the handle assembly about 90 degrees and then pull like hell to get it off. There's a small screw behind the door open handle and the plastic trim will slide out over the handle. The next bit is the worse, there is something like five or six screws hidden behind the carpet at the bottom of the door pocket, the carpet is stuck down with glue so the only option is to force a screwdriver through it to get to the screws beneath. Then it's just a case of pulling the sides of the door card away from the door to release a few plasic clips and then just lift the card upwards to take it off.
What year is your car? I *might* have a Haynes manual in pdf format for it
Si_CoupeGT- Starting To Speak
- Posts : 93
Join date : 2011-02-17
Age : 40
Location : Brookenby
![]()
![]()
Re: Audi Coupe GT rolling resto
![]() lewis1641 Wed May 04, 2011 11:57 am
lewis1641 Wed May 04, 2011 11:57 am
lewis1641- WingMan
- Posts : 1002
Join date : 2011-01-18
Age : 45
Location : brigg -
![]()
![]()
Page 1 of 3 • 1, 2, 3 ![]()
![]()


|
|
|